
Installing an automatic gate opener can be time-consuming, energy-draining, and even technologically challenging: you need time, patience, a lot of energy, and a desire to learn quickly. Moreover, different brands of gate openers have different installation processes: installing a Mighty Mule gate opener is quite different from installing a Zumi gate opener, for example.
However, there are some universal similarities in the process of installing a gate opener, so, if you are facing some trouble during installation, here are five things you are probably doing wrong.
Start with the Right Gate Opener for Your Gate Type
Even before you begin the start installing a gate opener, it is importanbt to check that it is compatible with your gate. Gates come in various styles, such as sliding, swinging, or dual-swing, and each requires a compatible gate opener.

-
For swing gates, look for a swing gate opener designed for single-swing gates or dual-swing gates, and ensure the motor’s capacity matches the weight and size of your gate.
-
For a sliding gate, make sure the gate opener is powerful enough to handle the length and weight of your gate.
If your gate is made of heavy materials like wrought iron, opt for a high-capacity motor. For lighter gates, such as aluminum or wood, a lower-capacity motor may suffice.
Selecting the right opener ensures smooth operation and prevents strain on the motor.
Installing an Automatic Gate Opener
And now, unto the five tips you need to keep in mind when installing your gate opener.
#1. Mount the Opener Properly
Always use high-quality brackets and fasteners to secure the opener when mounting your gate opener. If the mounts are weak or improperly installed, the gate opener will remain unstable and wobbly.
Even if this does not cause immediate issues, wobbly and improperly installed mounts will lead to operational issues and safety hazards down the line.
So, look through the manual again, and ensure the opener is mounted at the recommended height and angle specified in the manual.
#2. Position Limit Switches Correctly
During the installation process, test the limit switches of your gate opener multiple times, and adjust them carefully until they are accurately set.
The limit switches determine where the gate will open and close, and you should watch out when installing.
If your limit switches are not properly positioned, your gate will open too far or completely fail to close.

#3. Secure Wiring Connections
Installing an automatic gate opener requires some basic knowledge of electricity and wiring.
While installing, properly route and secure all electrical wires to prevent them from getting damaged or interfering with the operation of the gate opener.
It is advisable to use protective tubing for wires that are exposed to outdoor elements.
#4. Double-check all connections to ensure they’re tight and weatherproof
A crucial part of installing any gate opener is to ensure that you protect the motor housing, the control board, safety sensors, and other components that may be susceptible to water damage.
Here are some measures to protect these components:
-
Check the motor housing and ensure it is IP-rated for outdoor use.
-
Ensure the control box is waterproof, and install it in a location protected from direct rain and exposure.
-
Choose safety sensors designed to withstand outdoor use and install them at a height where water is unlikely to pool.
Run all the wiring connections through protective conduits and seal all joints with waterproof materials.
If you are installing a solar gate opener especially, ensure the battery is housed in a waterproof casing.
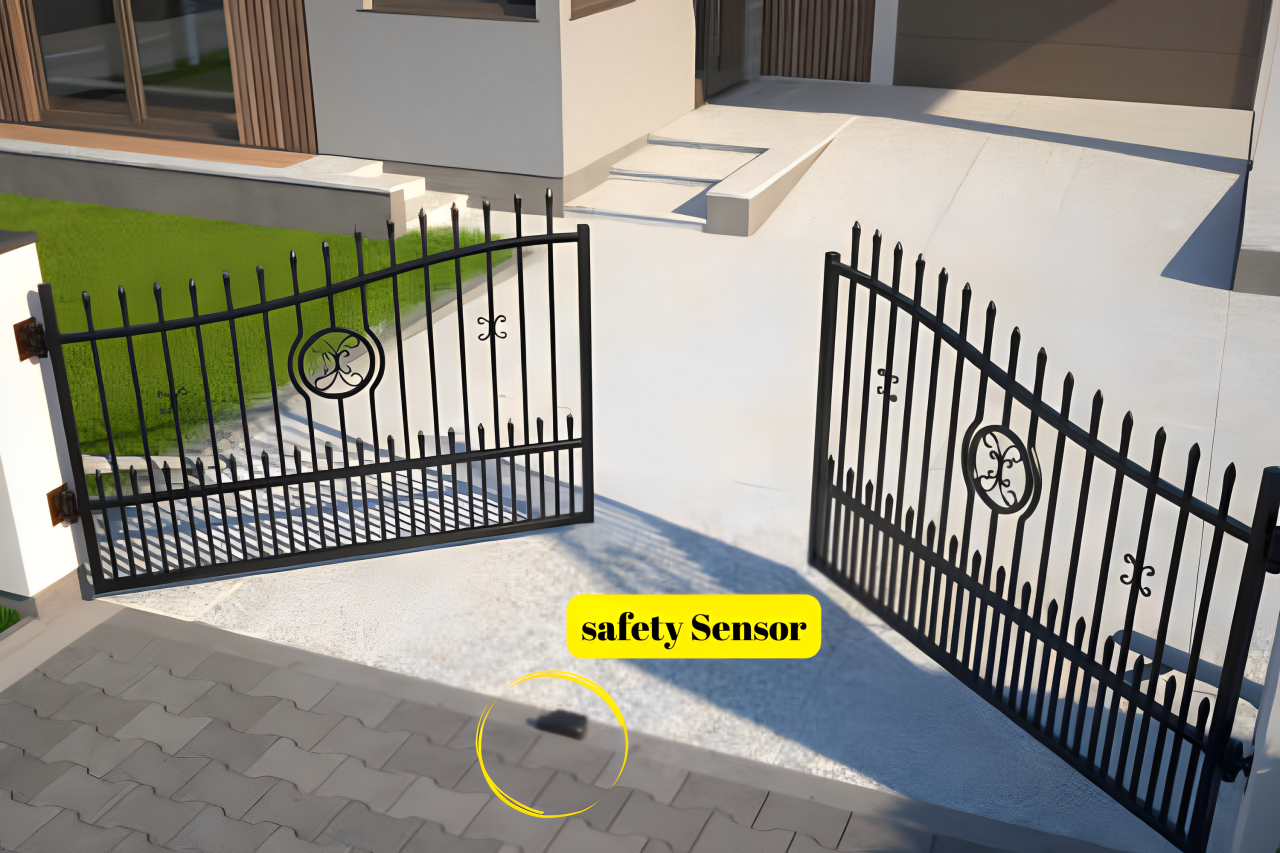
#5. Calibrate the Safety Sensors
If your gate opener includes safety sensors, install them at the appropriate height to detect obstacles effectively.
During installation, you can test the sensors by placing an object in the gate’s path: the auto-reverse function should kick into motion and cause the gate to stop and reverse.
Repeat this a couple of times just to make sure.
#6. Lubricate Moving Parts
When you are about 95% done installing your gate opener, it is time to lubricate its moving parts. Apply lubricant to hinges, rollers, and other moving components to reduce friction and wear.
Remember to use a lubricant recommended by the manufacturer: using the wrong lubricant might damage the materials of your gate opener.
Lubricating your gate opener does not conclude during installation. Lubricate your gate opener at least once in six months.
If your gate is used frequently, you should lubricate at least once in 3 months to keep up with the increased rate of wear and tear.
#7. Ground Properly for Electrical Safety
Proper grounding is crucial when installing a gate opener because it helps prevent electrical hazards. During installation, follow the manufacturer’s instructions for grounding to protect the system and its users from electrical surges.
For extra protection, it is advisable to invest in a surge protector. A surge protector safeguards the motor and other electrical components during storms or periods where power is unstable.
#8. Weatherproof the System
If your gate opener will be exposed to harsh weather conditions, consider using weatherproof enclosures or sealants to protect the motor and electrical components.
Regularly inspect and maintain the system to ensure it remains weather-resistant over time.

#9. Regular Maintenance Schedule
The last important step in installing your gate opener should be to set up a regular maintenance schedule to periodically check and service the gate opener.
Your schedule must include cleaning the tracks, checking for wear and tear, and testing the system’s functions.
Addressing these minor issues will promptly prevent larger, costlier problems down the line.
By focusing on these additional details, you can ensure a smooth installation process and long-lasting performance for your gate opener.
Should You Install Your Gate Opener by Yourself?
Except your manufacturer specified that you find a professional installation service, it is probably wiser for you to go ahead and install our gate opener by yourself.
Professional installation for an automatic gate opener can be very expensive: often ranging anywhere between $500 and $3,000.
In addition to labor costs, you often have to pay for electrical wiring and custom adjustments, which is in addition to the total cost of the gate opener itself!
Get a Gate Opener Today!
If your gate weighs less than 900 lbs, Zumi provides both single-swing gate openers and double-swing gate openers with powerful 50W DC motors that can support iron gates, aluminum gates, steel gates, and everything in between.
For heavy-weight models, you will find single-swing and double-swing heavy gate openers that support gates up to a total of 1100 lbs (500 each leaf).
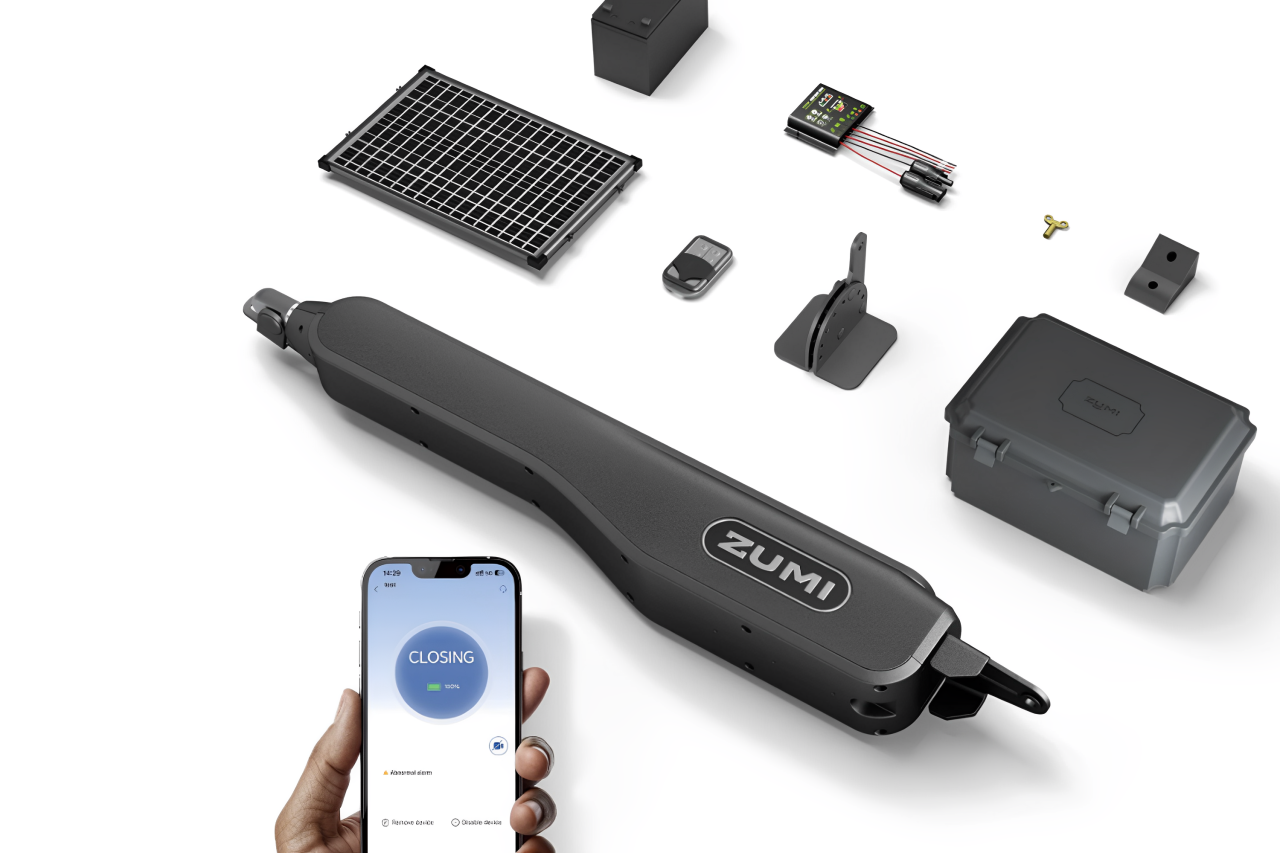
solar-powered gate openers
Zumi’s collection of solar-powered gate openers includes both single-swing solar gate openers and double-swing solar gate openers for gates up to 1,1000 pounds. The
Zumi WS1Gate Opener, for example, is a perfect option for single swing gates, while the Zumi WS2 works for double swing gates. For heavier gates, you can choose between the WS1 Pro and the WS2 Pro.
Conclusion
Installing a gate opener doesn’t have to be daunting. By following these nine important tips and additional focused advice, you can ensure a smooth installation process and enjoy the benefits of added security and convenience.
Look through the collection of gate openers available at Zumi, find the one that works for you, and enjoy the peace of mind that comes with a reliable, eco-friendly gate opener.
You can also learn why a gate opener will increase the value of your home and how Zumi gate openers can secure your home this year in 2025!
So go ahead, let the sun power your gate—it's a bright idea.